Monday 30 November 2015

Dolce & Gabbana SS 15 Campaign


Campaign: Dolce & Gabbana Spring/Summer 2015 


The Spring/Summer campaign for Dolce and Gabbana boasts a Spanish theme and styling. Domenico Dolce and Stefano Gabbana designed this collection of clothes which features heavily embroidered and patterned garments. The choice of colours such as red, black and white also give off a sexy Spanish vibe. 

The campaign was set in a studio with a background which had white washed stone walls with wooden features such as chairs and door ways. The advertisement even used Spanish music to further explore this concept.
Milan Fashion Week Beauty: Dolce & Gabbana Spring/Summer 15
Makeup by Pat McGraph
Model: Zhenya Katava

Makeup

As creative adviser for the makeup department, Pat McGraph designed this alluring look for the models. This included a rich dark red lip with winged smokey liner and bold brows. The makeup matches the colour theme within the costumes. The eye lid is bare whilst the crease is subtly dusted with a taupe shade to lightly extenuate the socket line. The skin is clean with a slightly dewy finish with just a dusting of pink blush on the apple of the cheeks.

As the base is quite light and dewy I would imagine a liquid product like MACs Face and Body would be applied to the skin. The eyebrows look evenly groomed and not too heavy so using a eye shadow powder which is the same shade as the brow should fill in any gaps and a Brow Gel from MAC could fix them into place. 'Brule' by MAC could be used as a base for the eyes as the base is very light. 'Omega' by MAC can be blended through the crease as this shade isn't too warm and is quite a neutral tone like the one in the photograph. A cake liner could be used for the winged eyeliner with MAC Fix Plus to increase its staying power. Mascara seems to be applied to the upper lashes but not the bottom. The lips are a dark Burgundy colour so MAC's Diva lipstick could be applied to them with the help of a lip brush. The cheeks have a subtle wash of colour on the apple which appears like the MAC Blush in 'Shy Beauty'. 


The Hair 

The hair was created by Guido Palau and was all very sleek and dark. The hair had a middle parting with a low bun on the back of the head which I would imagine was created used various twists which were then pinned into a bun as it looks like it has more shape to it than just an ordinary one section bun. The front sections of the hair are taken back into the bun covering the top of the ear. The hair was left like this or accessorized with either red flowers such as roses or golden bejeweled crowns and tiaras. 

The models also wore jewelry which matches the reoccurring theme of red,black and gold. Earrings were long and delicate. The necklaces were also long with small pendants. These balanced out the clothing as anything too bulky would have clashed with the intricate detail of the material. 


Dolce & Gabbana
Dolce and Gabbana Spring Summer Campaign
Photographed by Domenico Dolce

The outfits were heavily embroidered with small detail which to me resembled royalty and wealth. The models were dark haired which really helped to give off the western feel of the campaign. It also featured more mature woman which shows that Dolce and Gabbana want to include people of all ages and not keep it exclusive to one age group. The men almost resembled Spanish matadors (bull fighters) as they were dressed in elaborate buttoned jackets which were paired with patterned trousers and high length socks. 


I love how this campaign really explored Mediterranean culture in every aspect. I feel each element coincided (fashion,makeup,set and music) and worked together well. Out of all the campaigns I have come across I must say that this is defiantly one of my favorite as it is such a unique and fresh idea. I feel the theme really reflects the seasons of spring and summer as the use of rich, warm colours such as gold and red.


References 


Design Scene - Fashion, Photography, Style & Design, (2014). Dolce & Gabbana Spring Summer 2015 Campaign. [online] Available at: http://www.designscene.net/2014/12/dolce-gabbana-spring-summer-2015-womenswear-campaign.html [Accessed 30 Nov. 2015].

MODELS.com, (2015). Dolce & Gabbana S/S 2015 (Dolce & Gabbana). [online] Available at: https://models.com/Work/dolce--gabbana-dolce--gabbana-ss-2015/368340 [Accessed 3 Dec. 2015].

Sorin, K. (2015). 

Dolce & Gabbana looks to Spain in spring campaign - Luxury Daily - Advertising. [online] Luxurydaily.com. Available at: http://www.luxurydaily.com/dolce-gabbana-looks-to-spain-in-spring-campaign/ [Accessed 30 Nov. 2015].

Fashion Gone Rogue, (2014). Dolce & Gabbana Beauty 2015 Spring. [online] Available at: http://www.fashiongonerogue.com/dolce-gabbana-spring-2015-beauty/ [Accessed 3 Dec. 2015].

Marc Jacobs SS/14

Catwalk: Marc Jacobs Spring/Summer 2014


The Marc Jacobs Spring/Summer Catwalk grabbed the attention of the audience by creating a dark and sinister show with an unnatural washed up beach setting.  The use of such deep colours is bizarre for a Spring/Summer collection but I think this is the reason it is so intriguing. The pieces ranged from military style jackets to dark floral printed dresses. Some dresses also had a Victorian feel to it with lace material and a high neckline. The models also advertised black strappy sandals and occasionally black sunglasses. The background music was also very haunting which further darkened the vibe of this catwalk. 

Marc Jacobs Spring/Summer Catwalk

The Makeup 

The Makeup for this look was designed by Dick Page.
They used a bright blue on the eyes to pop against the cool tones of the clothing. The models were pale with a clear complexion. Blue Cat eye style liner was rimmed  on the eyes and black mascara was brushed on the lashes to open up and draw attention to the eyes. A nude lip and pale base accompanied this and made it obvious what feature the main focal point for the face was (the eyes).
The skin is so clean that the base had to be almost transparent for it to look fresh and natural. 
Teal blue or royal blue were used for the liner on the eyes. The cheeks had no contour or blush. The pencil liner that was used was Nars Eyeliner in Kaliste in a teal shade or Nars Larger than Life Long-Wear liner in Blue Dahlia. 


Makeup by Dick Page
Hair by Guido Palau

The Hair

The hair was created by Guido Palau. 
All the models wore wigs which were unevenly cut and blonde with dark roots. This made them look like sinister dolls and jagged cut of the hair was slightly unnerving when matched with the heavy colours of the collection. Each wig was bleached and the roots were dyed black to give the hair a creepy edge. Guido cut the wigs once they were on the model so he could consider the models face shape when giving the wig a rough bob and bangs. 


References


Vogue UK, (2015). Marc Jacobs Spring/Summer 2014 Ready-To-Wear. [online] Available at: http://www.vogue.co.uk/fashion/spring-summer-2014/ready-to-wear/marc-jacobs [Accessed 5 Dec. 2015].

Harpersbazaar.co.uk, (2013). backstage beauty: marc by marc jacobs ss14. [online] Available at: http://www.harpersbazaar.co.uk/beauty/beauty-shows-trends/backstage-beauty-marc-by-marc-jacobs-ss14 [Accessed 5 Dec. 2015].


Allure, (2015). Designer Faces: Marc Jacobs Spring 2014. [online] Available at: http://www.allure.com/beauty-trends/runway-beauty/spring-2014/marc-jacobs#slide=5 [Accessed 5 Dec. 2015].

Tanya Taylor NYFW SS/15


Catwalk: Tanya Taylor New York Fashion Week Spring Summer/2015

The Tanya Taylor Spring/Summer Catwalk for New York Fashion Week promoted a chic style with the use of graphic patterns. The colour theme was primarily orange, white, black and blue. Belts and strappy sandals in bold colours were added to accessorize the outfits. The white flowing dresses and skirts were refreshing and when partnered with a bright boxlike bag mad the perfect daytime fashion statement for the Spring/Summer seasons. The catwalk was also blessed with darker floral patterned dresses and knitted jumpers. I really love the style of most of the pieces from this collection as I feel the outfits are very wearable and reflect the season well. 


Tanya Taylor Spring/Summer Collection for NYFW

   
The Makeup
The makeup artist for this catwalk was Uzo (Nars). 
The makeup also featured the colour orange like any of the pieces in the clothing collection. This really tied the look together. The face was fresh faced and natural. To create this base she used a tinted moisturizer as it is light weight and allows the skin to be seen underneath the makeup. The eye makeup was subtle with only a slight orange toned eye shadow in the crease. A Nars Lip pencil in 'Timanfaya' was used on the lips to create the bright orange lip. The cheeks were highlighted to add glow to the skin. The eyebrows were brushed into place and lightly groomed. 

The Hair 

The hair was designed by Allan Wood. The hair had a middle parting and was smooth at the front. The back however had a loose braid at the bottom of the hair which added to the cute chic look. Texturizing spray was also used on the ends of the hair and hairspray was spritzed to give the hair shine.  


References 

Vogue UK, (2015). Tanya Taylor Spring/Summer 2015 Ready-To-Wear. [online] Available at: http://www.vogue.co.uk/fashion/spring-summer-2015/ready-to-wear/tanya-taylor [Accessed 5 Dec. 2015].

Natalia Galindo Make-up, (2014). Tanya Taylor NYFW Spring Summer/15. [online] Available at: https://nataliamgalindo.wordpress.com/2014/12/04/tanya-taylor-nyfw-spring-summer15/ [Accessed 5 Dec. 2015].

YouTube, (2015). Tanya Taylor - New York Fashion Week Spring/Summer 2015 - Fashion Network. [online] Available at: https://www.youtube.com/watch?v=hU0u6oSRTOk [Accessed 5 Dec. 2015].

Zac Posen NYFW SS/15


Catwalk: Zac Posen New York Fashion Week Spring/Summer 2015

The Zac Posen Spring/Summer Catwalk followed a colour theme of red, white and black. The red shade had an almost coral orange undertone to it which made it bright and fresh.
The collection was made up of dresses which were plain in detail but created bold silhouettes. 
The satin material which was used for some of his creations made the dresses appear more character and elegance so no embellishment was needed on this simple but classic style. The dresses ranged from knee length to floor length and from fitted to slightly more loose. All however held the colour theme well. 

KIM_3026
Collection by Zac Posen
Zac Posen created some dresses which clinged to the waist and displayed the models figure giving the silhouette an hourglass appearance. Other dresses offered a flowing skirt with a constructed boned bodice. Some dresses really showed off his spectacular tailoring by boasting sharp angular shapes which proved firm and hard to walk in. 

zac-posen-spring-2015-runway-beauty
Makeup by Kabuki
Hair by Odile Gilbert


The Makeup 

The makeup was created by Kabuki. The focus of the makeup was clean healthy skin with a bold red lip to tie in with the colour theme. The eyes were glossy to match the dewy skin and the cheeks had a rosy flush to them. The eyebrows were pretty natural and were not over-groomed. 

For this look I think the base would have been applied to the face first as the eye makeup is barely there so fall out would be non existent. The foundation looks quite light so MAC's Face and Body could be used as this product allows the skin to still be visible underneath. Then concealer is used just to cover any dark tones under the eyes so I would imagine a MAC Concealer Palette would be used. The cheeks look quite dewy where as the T-Zone is matte so the T-Zone would be powderd with a translucent setting powder. However to add shine on the cheek area MAC Stroke can be used to highlight the top of the cheekbone. MACs 'Fleur Power' Blush can be swept on the cheek bones to capture that healthy glow. Brow Gel by MAC can be run through the brows and any gaps can be filled with a powder which is the same shade as the models natural colour. MAC 'Brule' can be washed over the eye area with a fluffy brush for the base. 'Cork' can be swept through the crease to add some depth to the eye area. A light coating of mascara can be brushed on the top lashes and Vaseline dabbed on the eye lids to get a glossy finish. The lips were most probably lined first to create the perfect shape. I would expect a lip liner like MAC in 'Ruby Woo' would have been used with MACs Lipstick in 'Cockney'. The lips are matte so they could be blotted to take down shine and another layer of lipstick can be added. To further crisp up the lip line concealer one hade lighter than the skin tone can be added around the lips. 


The Hair

The hair is designed by Odile Gilbert who created this sleek wet look which pushes the hair away from the face. The hair has a side parting and a blow dry gel was smoothed through the hair on the top and sides to create the wet look. The front of the hair was combed in an upward motion to create a wave and a blow dryer was used to set the hair into shape. The hair is kept back from the face and pretty simple as to let the bold colours of the lips and dresses stand out and steal the show. 


References

Buro247.com, (2015). New York Fashion Week: Zac Posen Spring/Summer 15. [online] Available at: http://www.buro247.com/me/fashion/feed/ss15-zac-posen-nyfw.html [Accessed 4 Dec. 2015].

The Glass Magazine, (2014). NYFW SS15: Zac Posen. [online] Available at: http://www.theglassmagazine.com/nyfw-ss15-zac-posen/ [Accessed 4 Dec. 2015].

Makeupforlife.net, (2014). Runway Beauty: Glowy Skin with Red Lip at Zac Posen Spring/Summer 2015 - Makeup For Life. [online] Available at: http://makeupforlife.net/2014/09/glowy-skin-red-lip-zac-posen-spring-summer-2015.html [Accessed 5 Dec. 2015].

Burberry LFW AW/14

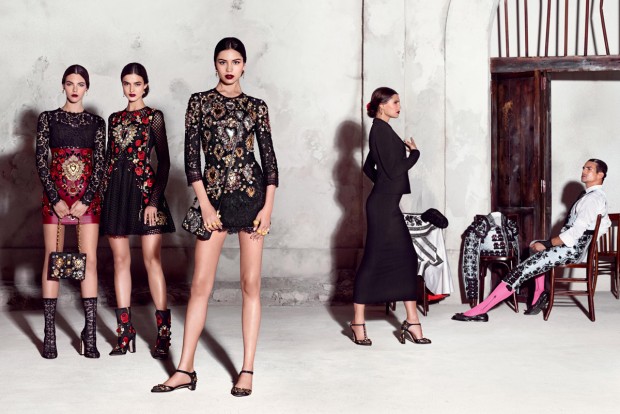
Catwalk Shows: Burberry London Fashion Week Autumn/ Winter 14

The Burberry Autumn/Winter 14 catwalk for London Fashion Week featured hand painted materials which show off the artistic flair of the collection. The hand painted patterns reminded me of tribal designs and it had a very bohemian loose look to it. The collection featured different coats and loose jackets which were fitted at the waist.The dresses were airy and light also featuring the swirling water colour designs. The pieces reflected the autumnal season by using various shades the colours green, blue and brown. The style of this catwalk was inspired by the a group of artists named as the Bloomsbury group. This group is made up of writers, philosophers, artists and critics. Sheer scarfs were layered over outfits to further complete the look and these were paired with open toed brown sandals and painted leather bags. The makeup and hair is a lot more neutral to let the individuality of the clothes shine through with this catwalk. Thin brown or beige leather belts also accompanied the waist which gave the flowing dresses and jackets shape.  


London Fashion Week AW14: Burberry paints the changing of the seasons
Model: Edie Campbell
Photographer: Tim P Whitby


The Hair 


The hair in this catwalk was designed by Neil Moodie. The theme for the hair was a bed head look. The hair stylists styled the hair to look and feel as if the models have just woken up. Detangling spray and oils were used to give the hair a natural looking shine. The parting was slightly off center and a hairdryer diffuser was used to create a soft texture in the hair. A texture spray was then spritzed throughout the hair to matte some of the shine and make it look clean and slightly fluffy. 

For my take on the hair we are allowed a bit of freedom to change the look up slightly if there isn't much difficulty to the hair style. As the hair is very natural I am going to set it with Carmen rollers just to add a wave to the hair. As the models don't seem to have a huge amount of volume in the hair I will purposely drag the rollers slightly to make the hair flatter instead of lifting the hair at the root. I will start by giving the hair a slightly off from the middle parting and then begin to put in rollers at the front of the hair. I will set the front section downwards in a column set on both sides and then brick set the back. Once the hair is cool I then take out the rollers and smooth serum through the hair to give it shine. 


Tools

Hair grips
Hair clips
Heat spray
Carmen Rollers
Tail comb
Denman brush

Makeup by Wendy Rowe
Model: Ola Rudnicka

Makeup

The makeup for this catwalk had a very light airy feel and was created by Wendy Rowe. The base was clean and fresh looking with a slight flush of pink on cheeks. The eyelids were tinted a cool toned purple with what seemed like a white pencil liner on the waterline to further brighten up the eyes. The lips were natural or nude but with very little shine. The eyebrows were quite full but this depends on how full the models eyebrows are naturally. Ola Rudnicka has very light brows therefore they wasn't filled in whereas Cara Delevingne has a much darker fuller brow. 

I chose to do this catwalk for my fashion makeup and hair assessment as I feel this look would really suit my model. I did a workshop session before my assessment on the makeup and trouble-shooted which products I think would work to recreate it. As I may not have what was used on the day I used my kit and adapted products so the finish appeared to resemble the catwalk look.  


MUA: Chelsey Pavey
Model: Chloe
I started off by using a micellar water on the skin to cleanse it and remove any makeup. I then used a foundation brush to buff some moisturizer into the skin. As the skin on the catwalk appears to be light and dewy I used a liquid foundation to replicate this. MAC Face and Body Foundation was applied to the skin and I used Kryolan Derma Colour Palette for concealer under the eyes. I then set the concealer with Kryolan Translucent powder. The eyebrows are quite full so I filled them in using a mixture of 'Brun' and 'Omega' MAC Eye Shadow. I then used MACs Brow Gel through the brows to set the hairs in place.  

The eyes were my next focus. For the Burberry look the eyes are a barely there purple wash of colour. As I didn't have purple in my kit I improvised by using my MAC Eye Shadows in 'Brule' and  'Cranberry'. This created the shade I needed. With a large fluffy brush I dusted this on the eye lid and smoked it out into the crease. I built the colour up as I went till I was happy with the colour. I also took it 3/4 into the lower lash line and added a white eye pencil to the waterline. This really opened up the eyes as the shadow on the lower lash line extenuates the white eyeliner on the waterline. Mascara was then brushed on the lashes with a fan brush. 

I then created the lip colour. The lips on the backstage photos look very nude and some even had a slight pink tone to them. As the colour slightly differentiates between each model I decided to make mine a light pinkish nude. I mixed the MAC Lipsticks 'Twig', 'Pretty Please' and 'Love Lorn' and applied this to the lips. As the lipstick in the photo doesn't seem to add much shine I didn't add gloss and used a tissue to blot the lips to mattify them. I then dusted a bit of MAC 'Tenderling' Blush on the apples of the cheeks. I used Kryolan Translucent Powder on the skin last as this helps the foundation to settle into the skin before it is set and also helps to buff in the blush colour on the cheeks and tone it down if necessary. 


Products 

MAC Face and Body Foundation
Kryolan Derma Colour Palette
MAC 'Brun' Eye Shadow
MAC 'Omega' Eye Shadow
MAC 'Cranberry' Eye Shadow
MAC Lipstick in 'Twig'
MAC Lipstick in 'Pretty Please'
MAC Lipstick in 'Love Lorn'
Kryolan White Eye Pencil
MAC 'Tenderling' Blush
Mascara
MAC Brow Gel
Kryolan Translucent Powder

Evaluation 

What Went Well: I really enjoyed having to adapt my products to recreate this catwalk look. I found it a little hard to figure out what to do for the eye makeup as I didn't have the same shade of purple as they have in the image but once I spoke to Branka she encouraged me to play around with a few shades in my palette and I quickly understood how to fix this problem. I think my model really did suit this look as I made sure I picked the catwalk makeup and hair based around my model and I think this one would look great on her. I think by the end of the makeup she really did resemble a Burberry model and I was pleased with the outcome. 

What I could Improve on: I found it hard to be so light with the product especially as this look is barely there and I am used to creating quite fierce looks in my fashion makeup lessons. Knowing when to stop adding product is definitely a skill to master as it is possible to over do it. I think when I do the makeup again I may have to add a bit more colour on the eyes just so it can be picked up on the camera but other than that I am happy with the makeup and feel ready for my assessment. I didn't get time in my fashion makeup lesson to practice the hair which I am slightly gutted about but as the hair isn't overly complicated I am sure it should be fine. 

Makeup and Hair by: Chelsey Pavey
Model: Chloe


Final Assessment Evaluation


What Went Well: I was really happy with how my hair and makeup turned out for my assessment as I felt my model really did resemble one of the girls from a Burberry catwalk. The makeup was clean and I adapted the intensity of certain colours to suit my clients natural skin tone. I felt this helped the makeup compliment her. The white liner on the waterline really made the rest of the eye makeup stand out. The hair was set in rollers but dragged slightly as I didn't want tight curls. The result was loose waves with an of center parting. I am really happy with the hair as although it isn't what they did backstage on the Burberry catwalk, I feel I have created my own version of the look which really worked well with the makeup. 


What I Could Improve On:  The hair went well but it wasn't without fault. When dressing the hair out I left the back of the hair to fall naturally but it left a slightly unsightly look on the crown. When speaking to Emma (my lecturer) she suggested I backcomb the hair over to cover any gaps in the hair. This made the hair have more of a solid shape which looked much better. When speaking to my lecturer about what I could improve on with the makeup, Branka suggested maybe adding a bit of highlighter to the nose as some of the pictures show a bit more of a glow in that area. This is something I should have picked up on when looking at the image and I will be sure to think of small details like this in future projects.


Hair by Chelsey Pavey
Model: Chloe


References

Gloss, G. (2015). Best beauty trends from London Fashion Week AW14. [online] Getthegloss.com. Available at: http://www.getthegloss.com/gallery/best-beauty-trends-from-london-fashion-week-aw14#slide-15 [Accessed 3 Dec. 2015].

Metro.co.uk, A. (2014). London Fashion Week AW14: Burberry paints the changing of the seasons. [online] Metro. Available at: http://metro.co.uk/2014/02/17/london-fashion-week-aw14-burberry-paints-the-changing-seasons-in-swirling-watercolours-4307081/ [Accessed 4 Dec. 2015].

Vogue UK, (2015). Burberry Prorsum Autumn/Winter 2014-15 Ready-To-Wear. [online] Available at: http://www.vogue.co.uk/fashion/autumn-winter-2014/ready-to-wear/burberry-prorsum [Accessed 4 Dec. 2015].

Wednesday 25 November 2015

Recreation of Image and Photo Study

Makeup: Photo Study and Recreation of Fashion Photograph

For our fashion makeup lesson today an image we given to us and we had to recreate the makeup on the spot. This tested our abilities to spot detail and gave us the opportunity to study the photo and improvise with the products we had.

This is the image I had to recreate. As you can see the base is very clean and dewy. The eyebrows are filled in to look fuller and they frame the points for where the eye shadow is to be applied. The eye shadow is an orangey cork colour which is applied all over the eye area aside from the brow bone. It is also smudged on the lower lash line. The waterline appears to be quite light so as to contrast with the orange shadow. The upper lash line seems to be a bit darker and the lashes have black mascara on them which is quite visible. The lips are a deep plum tone and a quite full. Gloss is also added over the lipstick for shine.

Photo Study Image
Firstly I decided to apply the base as the eye area doesn't have dramatic dark colours so I felt fall out wouldn't be a big problem with this look, The skin in the photo is quite dewy and the foundation doesn't look very heavy on the skin. I used MAC Face and Body Foundation as I knew this foundation is light but building and as my model has great clear skin I knew I didn't have to have a heavy coverage so Full Coverage would have been unnecessary.  I am aware the models skin in the photograph is quite pale but that is the model natural skin tone. Because of this I didn't feel like I needed to pale my foundation tone down so I matched it to the natural skin tone of my model too. Once I cleansed the face with micellar water and moisturized the skin I moved on to foundation application. I used a buffing brush to apply and smooth the foundation into the skin staring from the center of the face and blending outwards. I then moved on to concealer. I used the Kryolan Derma Color Palette and mixed up a concealer shade using the D32 colour to counteract any dark tones under the eyes. I got my model to tilt her head forward and look straight ahead, this gives me a clear indication of where product is needed. I then applied the concealer to the under eyes and any areas of the face that needed extra coverage which for my model was around the nose area. I blended the concealer into the skin and applied loose powder over these areas. I wanted to further add highlight to the nose, cheekbones and chin so I used MAC Strobe cream to do this.

Now that the skin is done I then moved on the the brows. I filled in the brows using the eye shadows 'Cork' and 'Brule' from MAC. With an angled brush I sweeped the colour through the brows and then used MAC Brow Gel to keep the hair in place and lock in the colour. The eye shadow shade is an orange shade so I used a couple of different shades mixed together to create the shade which I think best represented the one in the photograph. I took my MAC Eye Shadow Palette and used 'Rule' on a flat eye shadow brush and dusted this over the eye lid, inner corner and outer edge of the eye. The eye makeup is quite angular to I was careful to create straight lines on the outer edges of the eye. I highlighted the brow bone with MAC 'Brule' eye shadow. I took MAC's 'Carbon' on a small angled brush and pressed this into the upper lash line. Then using a small eye smudging brush I blended this out softly. As the water line is quite light I used a Kryolan white eye pencil on the waterline. The waterline in the photograph isn't white so I only made the waterline slightly lighter by sweeping the pencil through the waterline one or twice. The result was faint but just what I was going for. I then took the orange shade with which I applied to the upper eye lid, underneath the lower lash line and blended with out with a small fluffy brush. In the image the upper lashes look dark whereas the lower lashes appear to have no product on them. Therefore I only applied mascara to the top lashes with a fan brush.

The lips were the next step of the makeup. When looking at the image I realized that the models cupids bow was very angular and sharp. I recreated this by using a flat brush as this has a harsh edge so would give me the pointed effect. I mixed 'Hang Up' and 'Cyber' by MAC until I felt the shade matched and painted the lips starting with outlining the cupids bow and the edge of the bottom lip. This gave me a guideline. I could have used a plum lip liner before I went straight on with the lipstick but I felt I could get a cleaner, sharper edge with a flat brush. after applying the lipstick I ran out of time so I didn't get to build up the colour on the lips more and add lip gloss. This is my final outcome:

MUA: Chelsey Pavey
Model: Sophie

MUA: Chelsey Pavey
Model: Sophie

Products

MAC Eye Shadow 'Cranberry'
MAC Eye Shadow 'Rule'
MAC Eye Shadow 'Omega'
MAC Eye Shadow 'Cork'
MAC Eye Shadow 'Brule'
MAC Face and Body
Kryolan Derma Color Palette
Mascara
Kryolan Translucent Powder
MAC Strobe Highlighter
Kryolan White Eye Pencil
MAC 'Hang up' Lipstick
MAC 'Cyber' Lipstick

Evaluation


I found today's lesson very helpful and interesting as it gave me an insight as what could happen in industry. I have heard hat sometimes you can turn up to a job and been given a makeup look to follow (especially in fashion) but I have never had the opportunity to really study a photo a create it on a model.

What Went Well: I think product choice really represented my progress as I felt comfortable to select and mix products in order to match the colours and effects of the ones in the photograph. I think my final outcome did resemble the photograph although if I was to do it again I would change some elements.

How I could Improve: My timing seems to be an issue as I didn't get to finish the makeup which made me a bit disappointing. I think this is because where I was the model beforehand, we spent a bit more time taking photos from the previous makeup application therefore running into my time. To fix this I should have tried to speed up my application on the base so I could focus more attention and time on the eye makeup or lips. I didn't get time to add more colour to the lips to darken them and shape them more and I also didn't add gloss. Although I thought the makeup resembled the photograph I still think If I finished the look it would've looked a lot better. I think the eye makeup could be a bit more vibrant as in the photo they stand out more. My model had smaller lips than the model in the image so I think that made a big difference. To fix this problem I should have overdrawn them a little bit more to make them appear fuller.

Looking back at my final outcome compared to the original image I can see quite a lot of things I would change or add to. Regardless of the problems I faced today due to my timing issues I still thoroughly enjoyed this exercise.


Hair Crimping

Hair: Hair crimping and other techniques

Today we learnt about hair crimping in our fashion hair lesson. We had a demonstration at the start of the lesson with my lecturer Emma which showcased different techniques we could use to get many unique effects in the hair. The first technique was crimping. Emma sectioned the hair into a middle parting and further sectioned it by the ears on each side. This gave the hair for sections. she clipped up the front sections and look a bottom section out of the back sections before pinning them up to. This gave the hair five sections into with four clipped up and one ready to use. Once the crimpers were hot she then proceeded to take a piece of hair from the loose section and pressed the crimpers onto the hair closest to the root first. It is important that the heat of the crimpers doesn't burn the hair so the temperature must not be too high. Most electrical hair equipment will have a temperature gauge which you can adjust. If the hair starts to smoke ten remove to appliance from the hair and adjust the temperature to a lower heat. The hair should also have heat protection spray on to further protect it from burning. This process can be repeated on all the sections of hair in order for it to all have the crimped style. For the demonstration Emma showed us some other techniques such as Rick Racking. This involves taking a hair pin and wrapping a small section of hair around it in a figure of eight. Once the hair is completely wrapped around the pin then hot straighteners can be held on the pin to add heat to the hair. Once the straighteners are removed and the hair has cooled down the pin is taken out and a wavy texture has set in the hair. Once combed out the hair becomes quite frizzy and afro like. This is great when wanting volume in the hair.

I decided I was just going to crimp the hair with crimping irons. Then I wish to style it up in two sections. The back section is to be in a pony tail and the front section will be back combed and form a quiff which will then be clipped into the crown of the hair and the remaining hair plaited and twisted around the pony tail to blend in the hair band.

I sectioned the hair by taking a square shaped section from the front of the hair to the center of the head, not going too far down to where the ears are as this will be pulled into a pony tail. I then clipped this center section up and out of the way. I started to clip the rest of the hair up but leaving a section at the bottom. I then begin to crimp the hair in this section by taking out small sections as I go crimping each. Once the whole of the first section is crimped and ready I comb it with a smoothing brush and tie it into a pony tail. I then begin to take down the front center section little bits at a time and crimp it. When this section is completely crimped I then backcombed it underneath and clipped it back. With the left over hair I put it in a plait and twisted around the pony tail hair band. This hid the hair band and made the hair look more decorative.
Here is my final outcome:


Crimped Hair Style
Hair by Chelsey Pavey

Crimped Hair Style
Hair by Chelsey Pavey

I didn't get time to finish and style my crimped hair so I practiced some rick racking braids at home.

Rick Rack Braid
Hair by Chelsey Pavey
I started the rick racking technique by clipping the hair up and but leaving a small section at the bottom. I then took a pin and a small section of the hair and twisted it in a figure of eight around the pin. Once all the hair is around the pin then I pressed the straighteners on it. I then removed the straighteners from around the hair and moved on to follow the same process on the rest of the section. By the time the section is complete the first pin should be cooled down allowing me to take it out. Once I removed the clip the hair took on a wavy shape. 

This was the outcome of this step:

Rick Rack effect on hair
Hair by Chelsey Pavey
I then ran my fingers through the wavy strands of hair and got an afro-like effect. This is very easy to back comb and creates a lot of volume in the hair. 

Rick Racking Effect
Hair by Chelsey Pavey

Evaluation 

What Went Well: I found crimping quite simple to do and the effect really made a difference on the hair. I enjoyed Rick Racking once I got the hang of it although I did find that it is a lot more time consuming than just crimping the hair. 

What I Could Improve On: As I modeled for someones makeup session I couldn't finish my crimped hair design so I had to finish it out of lesson. I think I would have had good time keeping if I didn't have to leave. The practice at home was fine as the hair was already crimped from the lesson and I already had an idea of how I wanted to style it. I did however find it hard to keep the plait in the center when wrapping it around the ponytail hair band. I used hair grips to pin it in place but I am still uncertain of the positioning but it was as neat as I could get it. I practiced rick racking at home and found it to be quite fiddly as sometimes the hair can get caught and tangled around the pin. After a while I got the hang of it and it became easier.


Face Charts

Makeup: Face Charts

Today in our fashion makeup session we got to get creative with face charts. We had a run through of how to complete one as a group with our lecturer Branka.


She started off by taking a blank face chart and using MAC 'Brule' to contour the face with a flat eye shadow brush. Slowly pressing the product into the paper in circular motions 'Brule' was applied on the edges of the forehead, along the sides of the nose, under the cheekbone area and along the jawline. More depth was added by taking 'Cork' by MAC and this was applied where 'Brule' was applied. Eyebrows are then added to the face chart. These can be created by either applying a dark eye shadow onto the paper with a small brush in the shape of the brows you want to create or by taking a pen and drawing with fine strokes the shape you desire. Small strokes should be added either way as these create realistic looking hair-like lines.


Face Chart by Branka Vorkapic


The eye makeup was applied to the lid and crease area with a small flat eye shadow brush. If the brush is too round it can be hard to press the powder into the paper so that's why flat brushes tend to be used more for the powder application. A burgundy shade is added to the eye area and black was added closer to the lid so to create a smokey effect. This is blended out and lashes are added by creating 'C' shapes on the lash line with a black fine liner.

For the lips water colour paints or Kryolan Aqua Color can be used. By adding water to a thin brush and dipping it in the paint of the colour required, small brush strokes are made on the lips focusing the colour on where the shadows would be. Wetting the brush slightly can help when blending the colour on the lips. This weakens the colour in certain areas which helps to show the highlight where the light is hitting the lips which make them more 3D. The edges of the lips can be darkened with a deeper shade of the same colour in order to exaggerate this. Branka used red and burgundy on the lips from her Aqua Color Palette to achieve this.


Face Chart by Branka Vorkapic


Hair is also added to the image using Aqua Color as well. Using brush strokes in a colour of your choice, hair is added to the face chart making it more realistic. Branka painted the hair loose and flowing in a brunette colour.  Fine lines can also be added to the hair or the contours of the face to create a more artistic sketchy appearance.

Here is the finished face chart:


Face Chart by Branka Vorkapic


Tools and Products

Face Chart
Pencil
Eraser (to erase mistakes made with eye shadow or to highlight areas of the face)
Kryolan Aqua Color or Water Colours
MAC Eye Shadow Palette
Black Fine Liner Pen
Makeup Brushes
Pen


I completed a face chart at home to further get some practice with what I learnt in my fashion makeup lesson.

Before
Plain Face Chart

I took a plain face chart and started shading the contours of the face with the Eye Shadow shade 'Brule'. I used a flat eye shadow brush and in circular motions and began to blend the colour around the forehead, cheekbones, jawline and sides of the nose. I then deepened this contour by adding the shade 'Cork' from my MAC Eye Shadow Palette. I then added eye brows to the face chart by using small hair like strokes with a Black Fine liner. The eye makeup was then added. I started off by blending the 'Sketch' Shadow into the outer lid area. I then added 'Amber Lights' on the inner lid and 'Goldmine' to the inner corner blending them together with a small flat brush. I then added 'Brun' to the crease and blended this upwards. To further darken the crease I added 'Carbon' but I didn't blend this as far upwards as I did with 'Brun'. I also added a tiny bit of 'Carbon' on the outer half of the lower lash line. Once I felt happy with the eye shadow I then proceeded to add lashes with a black fine liner. I used MAC 'Tenderling' blush on the cheeks to add some colour to the face.

I decided I wanted light brown/amber eyes so I used a eye shadow on a cotton bud to add colour to one side of the iris and blend it through with the clean side of the cotton bud to spread out the colour. This gave it a fading effect. I also like to add a bit of shading with a fine liner around the edge of the darker side of the iris to further darken it and make the eyes more 3D.

Lips were the next step on the face chart. I decided I wanted to use a deep purple on the lips to make this more of a night time look. I used my Kryolan Aqua Color Palette to mix up a dark purple by using a medium purple shade and a tiny bit of black. I then used a small thin brush which was wet, in the colour and painted it on the lips focusing most of the colour on the edges. I then wet the brush again to remove excess product and blended the existing colour on the paper into the center of the lips to create a 3D effect.

I moved on to the hair and matched the colour with the eyebrow colour by using black. I used a medium flat edged brush to create bigger brush strokes and made each stroke wavy to give the hair shape. I also added a side parting to complete my image. A highlight was added to the side of the hair above the parting using white Aqua Colour to give the appearance of light shining on the hair.

Here is my completed face chart:


After
Face Chart Completed by: Chelsey Pavey


Products and Tools

Face Chart
Kryolan Aqua Colour Palette
Black Fine Liner Pen
Cotton Buds
Mac Eye Shadow Palette
MAC 'Tenderling' Blush 
Makeup Brushes/ Paint Brushes

Evaluation 


What Went Well: I really enjoy making face charts as it feels very therapeutic. I also like seeing the difference between the before and after photos as it makes me realize how much of a difference I have made just by adding my makeup design. 

What I could Improve on: Sometimes I think getting the symmetry right on face charts can be a challenge. Also making sure the shading and highlights are in he same place for different elements of the face. For example if the lighting is supposedly coming from one direction then the highlight shouldn't be on the opposite side of the face. I did the highlight on the lips slightly wrong as I have created the rest of the face according to the light coming from the right of the image. So my highlight should have been less centered and more to the right on the lips. I think this is something I should keep in mind when creating face charts in the future.