Wednesday, 26 October 2016

Bodypainting Inspiration
Bodypainting Inspiration
Cartoon Characters
One of my hobbies is creating character body and face paint looks at home. Here is a few which is have tried myself:
 |
| Jack Skellington from A Nightmare Before Christmas MUA: Chelsey Pavey |
 |
| Coralines Other Mother from Coraline MUA: Chelsey Pavey |
 |
| Cheshire Cat from Alice in Wonderland MUA: Chelsey Pavey |
 |
| Cheshire Cat from the Cartoon Version of Alice in Wonderland MUA: Chelsey Pavey |
Bodypainted Clothing
Anatomy (Muscles and Bones)
Nude Photography
Sunday, 23 October 2016
Products used for Bodypainting
Products used for Body Painting and the Differences Between them
Water Activated Paint
Water Activated paints are exactly what they say they are: Water activated!These can come in two forms; Glycerin or wax based paints.The paint is completely dry without any liquid to activate it, the more water added the more runnier and diluted the colour.
Glycerin Based Paints:
These paints are generally softer as a cake and tend to have a smooth consistency.
They can dry slower which is helpful when blending colours together. They can also
be set with powder to increase their longevity. These tend to work well as a base and can hold powders and glitters quite well. They can be rubbed off the skin if that area is touched a lot and can be harder to use when trying to do detailed lines as it is easy to load too much product on the brush when mixing it with water. Very easily to remove with water after application is done.
Brands:
Mehron Paradise Paint
pro Paint Graftobian
Kryolan Aquacolor
Snazaroo
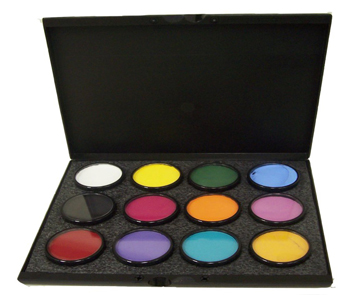 |
| Mehron Paradise Paints |
Wax Based Paints:
Wax based paints are also activated by water or liquid. They tend to be thicker than the glycerin paints and are good for line work and details. As a base it can feel heavier than glycerin based paints.
They dry a lot faster and may be harder to blend. As a cake they can be a lot firmer and can be very dry. They are more durable but can still be removed by water or sweat.
Brands:
Diamond FX
Wolfe FX
TAG
Cameleon
 |
| Diamond FX Paints |
Alcohol Activated Paints
Alcohol Activated Paints only become useful once alcohol has come into contact with them. They cannot be removed by sweat or water and can last in heat. These paints do not go off and last a very long time. It can only be removed with a removed or alcohol. These tend to be used more in special effects for bruising or veins. This is because if applied correctly the colours can look as if they are under the skin. The more alcohol used in the paints the more translucent the colour will be, whereas with less alcohol the colour will look stronger. They can also be used to paint on tattoos as they are long lasting and can look realistic. They are activated by 99% alcohol or the activator by the same company as the palette. These palettes tend to be very expensive though and are marketed more towards artists into special effects. They are hard and solid until alcohol is added. They are almost like watercolors. The alcohol can kick up some fumes as well so it's important to use these in a well ventilated area.
Brands:
Skin Illustrator Palettes
Reel Color Palettes
Encore Palettes
 |
| Skin Illustrator Palette |
Cream Makeup
Cream makeup doesn't have to be activated by anything and can be directly applied to the skin when needed. it is easy to blend and it is often oil based but this means it can be harder to wash off. Oil and water don't mix so you will need an emulsifier in order to clean the skin, most cleansers can do the job for this. Cream paints can dry sometimes but without being set with powder they can transfer or smudge quite easily. Can be longer lasting because they wont be removed by sweat. These can be harder to remove from the brush too so are not the best for lines and details sometimes. Colours can be mixed easily.
Brands:
Kryolan Supracolor
Kryolan character wheels
Ben Nye Cream Makeup Wheels
Makeup Forever Flash Palette
 |
| Kryolan Supracolor Palette |
References
I.ytimg.com. (2016). [online] Available at: https://i.ytimg.com/vi/PC1HaZXLHzU/maxresdefault.jpg [Accessed 23 Oct. 2016].
Annawilinski's Blog. (2013). What face paint is the best? Some info to help YOU decide!. [online] Available at: https://annawilinski.wordpress.com/2013/06/18/what-face-paint-is-the-best-some-info-to-help-you-decide/ [Accessed 23 Oct. 2016].
YouTube. (2016). "What Paint Do You Use?" | Differences in Bodypaint/Types. [online] Available at: https://www.youtube.com/watch?v=m6dTkgku19E&index=32&list=WL [Accessed 23 Oct. 2016].
Facepaintingparadise.com. (2016). [online] Available at: http://www.facepaintingparadise.com/uploads/1/9/0/6/1906895/4097056_orig.jpg [Accessed 23 Oct. 2016].
Facepaintingtips.com. (2016). [online] Available at: https://facepaintingtips.com/wp-content/uploads/2016/03/DFXPA107-2.jpg [Accessed 23 Oct. 2016].
Beautyholic.me. (2016). [online] Available at: http://beautyholic.me/wp-content/uploads/2014/10/Kryolan_supracolor_palette.jpg [Accessed 23 Oct. 2016].
Saturday, 24 September 2016
Crazy Jester
Crazy Jester
I wanted to do a look which was a bit different so I choose to do a jester. I made it more of a creepy design as I like the idea of a crazed jester.
For this look I couldn't find a jester hat I liked so I made a head piece to suit my design.
The Head Piece
Products and tools
Tin Foil
Black Electrical Tape
Masking Tape
A headband
Red Acrylic Paint
Black Acrylic Paint
Step by Step -
1) I took a plain pink headband and covered it in Black Electrical tape. I then ripped off a few sheets of tin foil and molded them into a horn shape. I repeated this again and so I had two. I then covered them in black electrical tape. I wanted to make them even bigger so I wrapped more tin foil around them until I was happy with the size. Masking tape was then wrapped around them and one was painted black and the other red.
2) Once the pieces were dry I then glue gunned them to either side of the headband.
Makeup
Products
Snazaroo Black Face Paint
Snazaroo Red Face Paint
Snazaroo White Face Paint
Snazaroo Pink Face Paint
MAC 'Ebony' Black Pencil Liner
Mascara
Black Eye Shadow
Red hairspray
Step by Step -
1) I started off by outlining the mouth with back face paint. The shape is a bit more pointed on the chin than any of the other mouth shapes I've painted. Once the outline in complete I then painted in the teeth inside and between each tooth I use pink paint to create a gum. I then filled I the teeth shapes with white and black was used to colour everything else in the mouth outline.
2) I then used red paint around the mouth outline and went on to outline the edge of this in black which will create lips. The eyes were the next step. I used black paint to create the harsh shape of the brow and then joined the bottom of the eye shape with the top. It's hard to explain the shape so it's easier to look at the face chart/ images of the final look to try and follow the shape. I then filled this in with red paint and shaded the inner corner with black eye shadow. I also blended this under the new brow. The waterline, lower and upper lash line were then lined with MAC's 'Ebony' Black Pencil Liner. I then blended this out with black eye shadow.
3) My face was then painted white and I added curved lines above my brows to make them appear raised. I also added dashes near the inner corner of my eye going onto my nose to make it appear crinkled. Black paint was used to paint on the nose which is almost the shape of a skeleton nose but just thinner and pointier. Again this is easier to follow the shape by looking at the images. I added smile lines just above the mouth too.
4) Mascara was swept through the lashes. White paint was taken down the neck and on the ears. I then painted white spiky shapes on the chest and outlined them in black. I used black shadow to add lines between the spikes to give them more definition. I also blended black shadow on the very tips of them.
5) I used the same Black Pencil to draw diamond shapes on the chest. The easiest way I found to do this was to use the gap between the two spikes and draw a triangle at the bottom of them to create a diamond. I then painted them black. This was extended down the chest with more diamond shapes in red and then in black.
6) White circles were added at the end of the spikes and I outlined these in black. My hair was put into pigtails (bunches) and the bottom were sprayed with red hairspray. I then put on the headband to complete the look
 |
| Crazy Jester MUA: Chelsey Pavey Headpiece also made by Chelsey Pavey |
 |
| Crazy Jester MUA: Chelsey Pavey Headpiece also made by Chelsey Pavey |
 |
| Crazy Jester MUA: Chelsey Pavey Headpiece also made by Chelsey Pavey |
 |
| Crazy Jester MUA: Chelsey Pavey Headpiece also made by Chelsey Pavey |
Subscribe to:
Posts (Atom)